Sunday, August 20, 2017

Wonder Toddler Pinafore


Nothing says "I am Womyn, hear me roar" quite like a pinafore.

It all started when I was walking around the grocery store on a Friday afternoon with toddler in tow. I spied a Wonder Woman action figure in the toy aisle and decided that if my child was ever going to have a Barbie-like thing it would be this one. Into the cart it went.

I haven't seen the movie yet -- waiting for it to be available for rent -- but Wonder Woman was now on my mind.

Saturday rolled around and I was scrounging for a project. I thought about starting a new quilt, but I wanted something I could finish in a day. I poked around my stash and noticed this super cute star pattern that I just got from a Hawthorne Threads Scrap Pack.


Inspired, I poked around a bit more and found half a yard of the cherry red above, and a gold-ish print. These latter two fabrics were purchased for home decor projects that they were ultimately not suitable for. They even still had the sticker on them from when I got them from Fabric.com.


I gathered an inspiration picture or two...


...and then I basically just started slapping stuff together.

The goal of this garment was to be a sort of play costume that would fit my daughter now and in the future. Therefore I didn't want to make it too fitted. 

I started with a little gathered skirt/apron using the blue star fabric. 


Then I mocked up half of the bodice, using the skirt as my guide. Above Average Toddler was sleeping at the time, so I didn't really have an opportunity to measure or anything. I just kind of felt it out. 

I liked the angular neckline. It seemed powerful.


I cut it out on the fold and made a few more tweaks. I cut a double layer so I could make a full lining.


To make the back straps, I cut a width of fabric the same width as the top of the bodice and roughly as long.


Next I sewed the necklines together...


...notched the corners...


...and then flipped it right side out and pressed it.


Then I sewed together one side of the straps and matched it to the bodice, keeping the arm sides open so I could insert the sleeves.


I have never made a ruffle sleeve before so I just winged it. I knew I had some extra fabric to redo it if I messed it up too badly.


I cut out little notches so I could turn over the seam and have it lay relatively flat.


I was using navy thread for this whole project because I don't have any red. The most visible place is here on the sleeve hem.


I pinned the sleeve so it was turned to the right side of my bodice/strap sandwich and then sewed it so all the seams were nicely hidden.


And then I was left with this when I turned it all right side out!


I laid everything else out. I had cut a band of the gold-ish fabric for a sash/belt.


I realized that the straps would just continue to fall down if I did them straight up and down, so I crossed them in the back. If I had planned this I would have made them a bit longer to compensate. 

Also at some point not pictured, I sewed everything together. I hadn't found an elegant way to attach the top and bottom to the belt, so I used a star stitch on my machine. I figured it was going to be visible anyway so might as well go with it.


Also, in an effort to make this fit a variety of sizes, I added buttons to the bottom of the straps so they could be reconfigured on the belt. I had some really adorable gold hunter buttons in my button jar. 


AAT wouldn't put this on until today, so I finally got a picture of her wearing it. She is saying "cheese" and holding her Wonder Woman figurine. I'm glad she finally got excited about it, although I always knew she'd come around to it eventually.


Modeling the back:


All in all, it was a fun project and a nice stretch of my creative muscles. I held back on getting too constumey with it after considering adding a star applique on the front. I like that it's a relatively subtle homage to the character without being too literal.

Sunday, August 6, 2017

Lumberbaby


Back when Above Average Toddler was just a wee Above Average Infant, I got really into sewing but I hadn't built up my fabric stash yet. That meant I had no choice but to rifle through the clothing donation/throw out box for some raw material.

AAH (above average husband) has pointy elbows and is always poking them through his shirts, so there were a bunch of flannel lumberjack shirts that he couldn't wear in polite company anymore due to the elbows, but that were otherwise in fine shape. I figured I'd make an adorably small version for our adorable offspring.

I went looking through my pics to see if I could find a pic of the hubs wearing the shirt, but for some reason, despite the fact that he wore this shirt quite a lot I cannot find one.

Here's a male model in a similar shirt. Just imagine my husband's handsome face instead of that ugly mug:


Wait, what am I saying? No need to imagine when we have Photoshop:


I had also recently just purchased my new sewing machine. After years of using my mom's old janky non-computerized model, I finally splurged on a machine that actually worked without sounding like it was going to explode any second or encapsulate the entire world in tangled thread.

So because I just got the new sewing machine I was all fired up to try the fancy computerized stitches. This was way pre-blog -- let's say about a year and a half ago -- so I didn't document the process at all. I'll try to do my undergraduate degree in writing justice by being as descriptive as possible.


Step 1:
Using another shirt as a guide, I traced the appropriate width of the baby shirt at the top middle of the adult man shirt. This enabled me to keep the front buttons and collar of the original shirt.

Step 2:
Cut out the right length sleeves, using the baby shirt guide, from the lower wrist area of the original shirt. I eventually had to shorten these even more, which explains the creative cuffing. I made puffy sleeves purely so the existing cut sleeve would fit in the armhole I had cut.

Step 3:
Fix the collar so it wasn't enormous. That explains the little decorative stitch you see on the back that covers up the seam.

Step 4: Add some lace to the bottom, to add a little girl power.

Step 5: Add decorative stitching all over because new sewing machines are fun.

Done!


We then paraded our little lumberbaby around town wearing her shirt. Here she is wearing it at a 5-year old's birthday party. Apparently kindergarten is when firetruck interest peaks.


And below she models lumber-couture in the northern climes we inhabited at the time:


 There you have it. Upcycling at its finest!

Mystical Creature Quilt


[WARNING: The following post is heavy on the details and light on the laughs. Sorry folks. I am feeling more instructional than comical today. Don't worry: I'm still a below average sewist who can't resist animated gifs in my storytelling.]

I started watching a lot of tutorials on YouTube about quilting techniques and so I wanted to try out some of the things I learned. I took a look in my stash (recently re-organized and neatly displayed during my sewing room makeover) to see if I could find the raw material for a quick baby-size quilt.


I also enlisted the help of my mini-me to do some critical wooden farm animal threading. She's not much of a conversationalist but pretty good company nonetheless.

Next I needed some pattern inspiration. I took a look at my Pinterest board to see if anything struck my fancy and I decided on this arrowhead pattern.

@babynelldesigns as Instagrammed -- if that's even a word -- by @artgalleryfabrics


I had 8 different fabrics for the arrowheads, so I figured out I could only do 4 x 5 blocks because I wanted to do each color in a diagonal. Initially I thought I could do 5 x 6 but then I blocked out each color (chart on the right in the image above) and figured out I'd need more fabric patterns to do that/I'd need to repeat some.

Next I had to figure out how big each of the "blocks" were.

One arrowhead = 1 block = 4 squares/half square triangles.

Based on a baby quilt total size of 36" x 52", with 4 blocks on the 36" side and 5 blocks on the 52" side, I figured out I could do 9" blocks. This means the finished quilt size will be about 36" x 45", not 52" long.

[MISTAKE #1: As I'm typing this I realized I forgot to account for the .5" of seams for the blocks once they're sewn in, making each finished block 8.5" inches, NOT 9". I didn't really care too much how big this quilt was since it was just for funsies, so this doesn't really bother me.]

With 9" blocks, I needed the finished size of each of the 4 squares/half square triangles to be 4.5", which means each pre-sewn in square needed to be 5" to account for seams.


A half-square triangle, HST for short, can be made by taking two slightly larger squares, sewing them together as I'll show below, and then cutting them to make two HSTs. In order to do that, I needed each of the squares for the HST to be .5" bigger than the pre-sewn squares to account for the seams.

Now that I knew the size of the pieces I needed, I could figure out what I needed to cut. I made a handy chart below for each of the 8 colors. In my first sketch I had figured out that for each block of 4, I needed:

1 - white background square = 5"
1 - white background square to be made into 2 HST = 5.5"
1 - contrast square for the lower left corner of the arrowhead = 5"
1 - contrast square to be made into 2 HST = 5.5"

Since all of the background squares were white, I could just add up all of the blocks to figure out how many I needed. For the contrast fabrics, I used my first grid where I figured out how many blocks of each fabric I would need based on how long the diagonal was. Then I knew how many squares of each fabric I needed.

The left-most column is the number I used to indicate the different contrast fabrics in my initial grid. So 1 = contrast fabric 1. I should have used letters to distinguish this from the actual numbers. Bah.

Here are the fabrics I used. I shuffled them around a few times on their "bolts" to find the most harmonious configuration. The pic above does not show the final order.

  • Background fabric: my favorite white with metallic silver spots. I should figure out the name of this.
  • Color 1 above: Sea waves with a fish tail
  • Color 2: Mermaids
  • Color 3: Zoo animals -- not strictly mystical but this is stash fabric so go with it
  • Color 4: Unicorns!
  • Color 5: Sheep. Basically mystical creatures.
  • Color 6: Little gold hearts. I've always found the heart to be a mystical thing.
  • Color 7: Stars. Nothing more mystical than the vastness of space.
  • Not pictured: I added in a fabric that's navy blue with gold arrows.


Then I got to cutting.


Boom.


Next I drew diagonal lines on the larger white fabric squares. This was the guideline for the half-square triangles. I paired these up with the larger contrast fabric squares and then chain-sewed a quarter inch from the line on one side, flipped the whole chain around and sewed a quarter inch away from the line on the other side.


Then I sliced down the center of each and I had 2 HSTs! I ironed and ironed and then I had this:


Next I put everything up on my design wall to see how it looked.

The fabric on it is super neat because the fabric just sticks to it when you give it a good smoosh with your hands. I'm sure there are some rules of science or something about why the fabric fibers hold onto each other like super light velcro, but I haven't taken a science class in 13 years so what do I know?


Next I used the chain piecing technique I recently learned...


...and very soon I had all my rows done! Having everything up on the design wall made this super easy and the chain piecing not only kept everything neat and in order, it also meant less thread clipping, resettling at the sewing machine, and forgetting where things went.


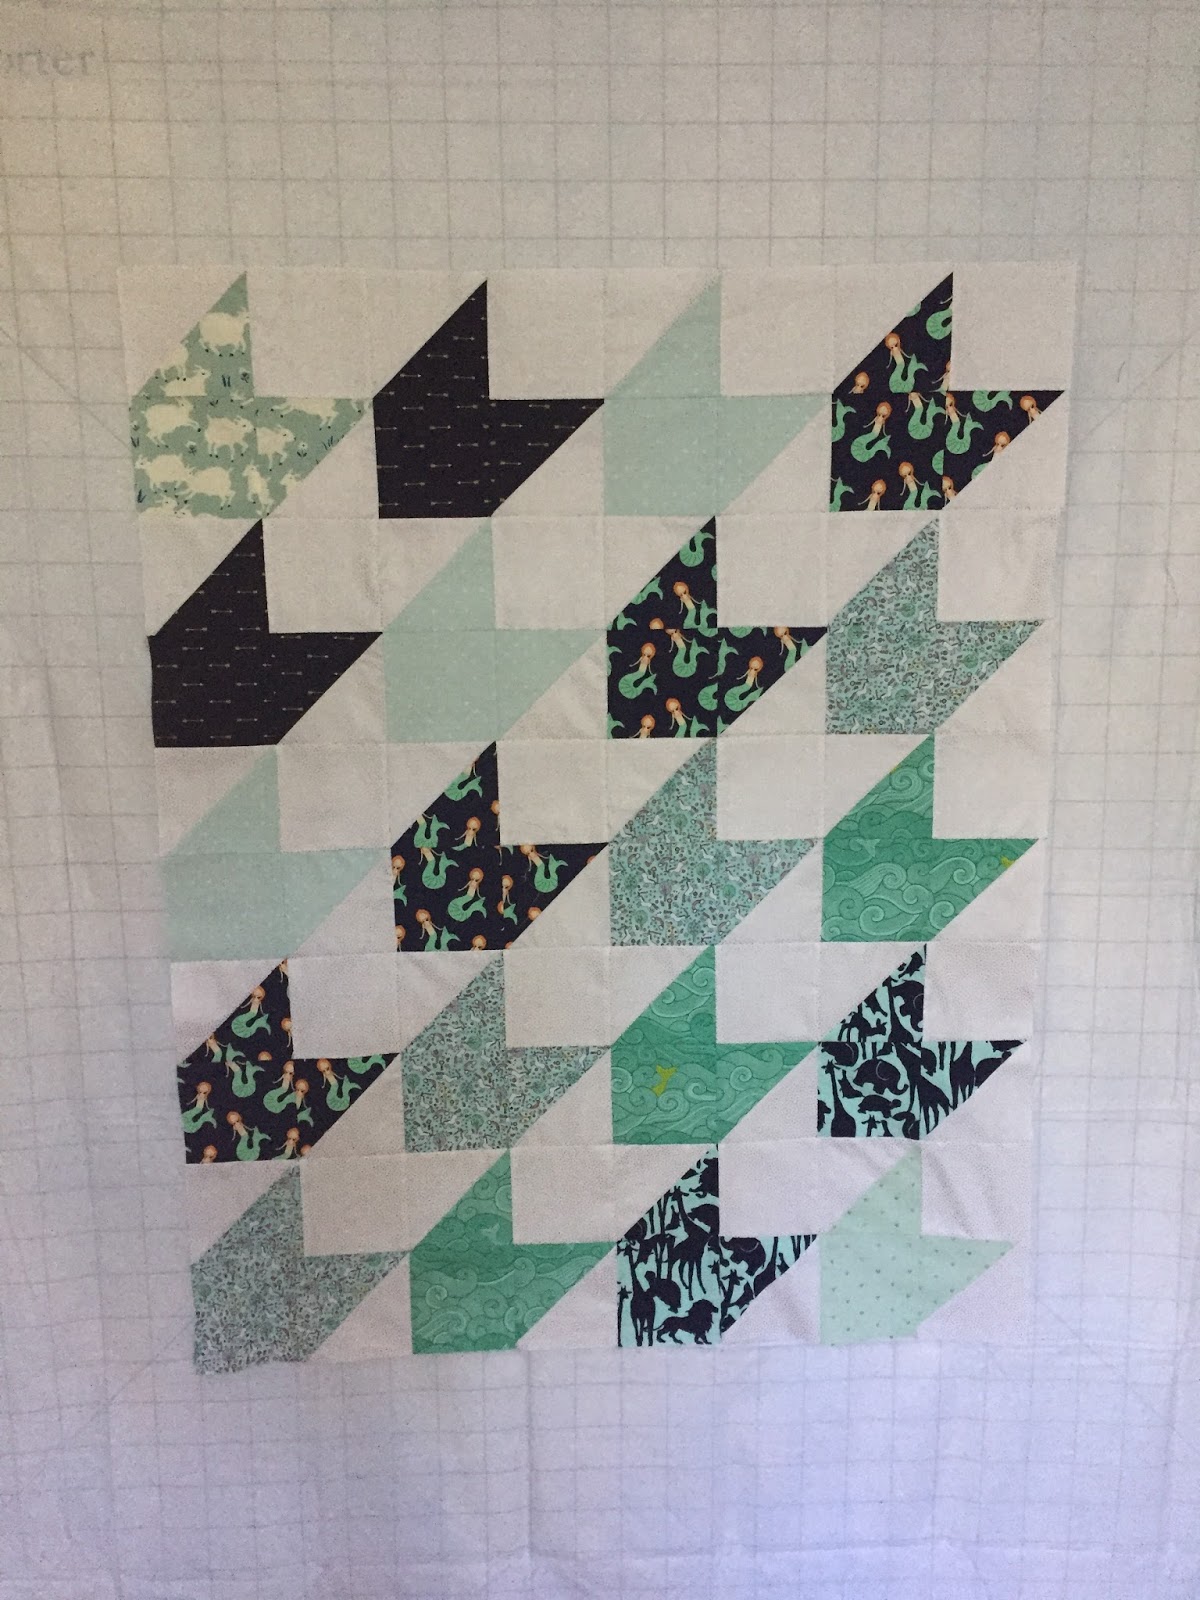
About an hour after I started piecing I had a finished and ironed quilt top! I think the whole quilt from start to finish took about 3 hours which is definitely a record for me. I think the first quilt I ever made took me about 3 months to finish cutting and piecing and another year or so to finish quilting. :) 

But that's a story for another day. 

For now I am enjoying how quickly this came together. I still need to find some fabric for the back/dig something out of my stash, but I'm already knee deep in another project and I'm in no hurry to wrap this up given I have no plans for it.

Using the new things I learned, I not only accomplished this much faster (and with fewer errors) than I'm used to. It also looks the nicest! I was very consistent in my quarter-inch seams, and I even squared up my HSTs once they were sewed. I guess there's a reason you're supposed to do all of those things.

Another new thing: this is the first quilt I've made that is actually the same width at the top and bottom. When I line it up with the grid on my design wall is completely straight on all 4 sides.

Am I...improving?!?

Newest Post

Going to the Chapel: Kim Dress + Pleated Skirt